
How to Prevent Peptide Contamination in the Lab

A peptide can arrive with a strong analytical profile and still become unsuitable for consistent research once it enters an uncontrolled workflow. A single lapse - an unclean vial septum, reused consumable, poorly labelled aliquot or repeated temperature cycling - can introduce contaminants or accelerate degradation. Knowing how to prevent peptide contamination therefore starts with treating receipt, reconstitution, storage and retrieval as one controlled process rather than separate tasks.
For research buyers, contamination control protects more than a sample. It protects data integrity, repeatability and the ability to investigate an unexpected result with confidence.
Begin with verified materials and batch traceability
Contamination prevention begins before a vial reaches the laboratory. Source peptides from suppliers that provide clear batch-level documentation, including a Certificate of Analysis and stated analytical method. HPLC data and analytical claims are not a substitute for careful handling, but they establish a documented starting point for the material entering a research programme.
On receipt, inspect the outer packaging and vial before placing the product into storage. Record the peptide name, batch or lot number, receipt date, stated storage requirement and expiry or retest date where supplied. Keep the accompanying documentation tied to that batch in a laboratory record system.
This traceability becomes especially valuable when several related peptides or multiple batches are in use. If a result changes, researchers should be able to determine whether the cause may relate to a particular lot, reconstitution event, storage location or handling operator. Labels written only as an abbreviation or handwritten without a date leave too much room for error.
ApexLink Peptides provides batch-specific Certificates of Analysis to support this initial verification step. The laboratory still needs its own receiving and inventory controls, because supplier documentation cannot account for what happens after delivery.
Control the work area before opening a vial
Peptides do not require the same handling environment in every application. The right control level depends on the method, sample type and whether the material will contact cell culture or sensitive analytical systems. However, every workflow benefits from a clean, organised preparation area with a defined separation between unopened stock, active samples and waste.
Disinfect the bench using a cleaning agent appropriate to the laboratory's procedures, then allow the surface to dry fully. Use fresh, low-retention tubes, sterile single-use pipette tips and clean racks. Gloves should be changed if they contact non-clean surfaces, packaging, keyboards, door handles or another sample set.
Avoid preparing peptides beside powdered reagents, open biological samples or aerosol-generating procedures. Cross-contamination is often a workflow design problem rather than an obvious visible event. A shared bench may look clean while still carrying residues from a previous assay.
Where aseptic conditions are required by the protocol, carry out preparation in a properly maintained clean-air cabinet and follow the facility's validated cleaning and monitoring procedures. A cabinet is not a cure for poor technique: clutter, unsuitable airflow practices and bringing contaminated items inside can defeat its purpose.
Treat every vial exterior as a potential transfer point
Before puncturing a stopper, wipe the vial septum with an appropriate sterile alcohol wipe and allow it to air-dry. Do not fan it dry or touch the surface afterwards. This brief step limits the transfer of residues from packaging, gloves or storage containers into the vial during needle entry.
Use a new sterile needle and syringe for each vial access where a needle-based method is necessary. Never return unused liquid from a syringe, pipette or working tube to the original vial. That practice can transfer trace material, microorganisms or incompatible buffer components into the stock and compromise every later use.
Use suitable diluents and single-use consumables
Reconstitution is a high-risk stage because it combines an exposed peptide with a liquid, device and operator. Select the diluent specified by the research protocol and confirm that it is compatible with the peptide and intended assay. Water documentation, pH, ionic strength and excipients can influence stability as well as analytical performance.
Use unopened or appropriately controlled sterile diluent. Do not assume that a bottle is acceptable simply because it has been refrigerated or looks clear. Once opened, aqueous materials must be managed according to their stated storage conditions, in-use period and laboratory procedures. If microbial control is required, use a suitable preserved diluent only where it is scientifically justified and compatible with the experiment.
Work deliberately. Confirm the vial label before adding diluent, use calibrated equipment and avoid touching sterile connections, pipette shafts or needle hubs. Gentle swirling is generally preferable to aggressive shaking, which can create foam and may place unnecessary stress on some peptide preparations.
The goal is not merely to dissolve material quickly. It is to produce a preparation with known identity, known concentration and known handling history. Record the diluent, volume, date, time, preparer and calculated concentration immediately after reconstitution.
Aliquot to reduce repeat access and temperature stress
Repeatedly opening or puncturing one stock vial creates repeated opportunities for contamination. It also exposes the preparation to unnecessary changes in temperature and condensation. Aliquoting is one of the most practical ways to reduce both risks.
Prepare aliquots sized for a single planned experiment or a short, defined use period. Use sterile, compatible, low-binding tubes and label each one with the peptide identity, concentration, diluent, preparation date, storage condition and batch reference. Where multiple operators use the same inventory, include an unambiguous internal sample ID.
Aliquot size depends on experimental demand. Very small aliquots may reduce waste and repeat freeze-thaw exposure, but they can increase handling time and the number of containers to track. Larger aliquots reduce preparation steps but can lead to repeated access. The correct balance is the smallest practical volume that supports the intended workflow without forcing routine refreezing.
Do not combine residual material from separate aliquots, even when labels appear identical. A small saving in material is rarely worth losing confidence in the entire stock.
Store according to the peptide and formulation
Storage conditions should follow the supplier documentation and the requirements of the specific peptide. Lyophilised material and reconstituted solutions may have different stability profiles, and no single temperature rule applies to every compound.
Keep storage areas clean, monitored and clearly organised. Use dedicated boxes or racks to separate peptides by project, batch or status. Place labels so they remain readable after cold storage and avoid overfilling boxes, which increases the chance of selecting the wrong vial or leaving a freezer door open while searching.
For sensitive working solutions, minimise freeze-thaw cycles by retrieving only the aliquot required. Avoid leaving vials on the bench while preparing unrelated materials. If a sample is thawed, handle it promptly and follow the documented procedure for its use or disposal rather than assuming it can be returned to storage indefinitely.
Temperature excursions should be documented, not ignored. The impact depends on duration, temperature, formulation and peptide stability data. When the excursion is significant or uncertain, quarantine the material and assess it against the protocol before using it in a critical experiment.
Prevent cross-contamination during routine use
Most preventable incidents occur during ordinary, repetitive work. Build checks into the moments when attention is most likely to drift: selecting a vial, preparing an assay plate, changing tips or returning samples to storage.
Use one peptide or one sample set at a time where possible. Keep original stocks physically separate from working solutions, and never share pipette tips between samples. If a multichannel workflow is used, plan plate layouts to reduce carry-over risk and change consumables whenever the procedure requires it.
Clear labelling is a technical control, not clerical administration. Every tube should be identifiable without relying on memory. At minimum, labels should distinguish peptide identity, concentration, date prepared and operator or experiment reference. For higher-volume operations, barcode-based inventory systems can reduce transcription errors and create an auditable chain of custody.
Know when to quarantine or discard a sample
Visual inspection is useful but limited. Cloudiness, unexpected particles, leakage, a damaged stopper, an unreadable label or a record gap are valid reasons to stop and investigate. A solution that looks normal may still be contaminated or degraded, so visual appearance should never be treated as proof of suitability.
Quarantine material when its identity, storage history or handling status cannot be verified. For critical work, consider confirmatory analytical testing in line with the laboratory's documentation system. The cost of replacing an uncertain vial is usually lower than the cost of repeating an experiment built on questionable material.
A reliable peptide workflow is built from simple disciplines performed every time: verified source material, clean preparation, controlled access, accurate records and storage that matches the compound. When those disciplines are routine, contamination becomes easier to prevent, easier to detect and far less likely to undermine valuable research.
More from the research library.

When Should Peptides Be Aliquoted in Research?
Learn when should peptides be aliquoted, how to minimise freeze-thaw stress, and how to document resea...
Read article →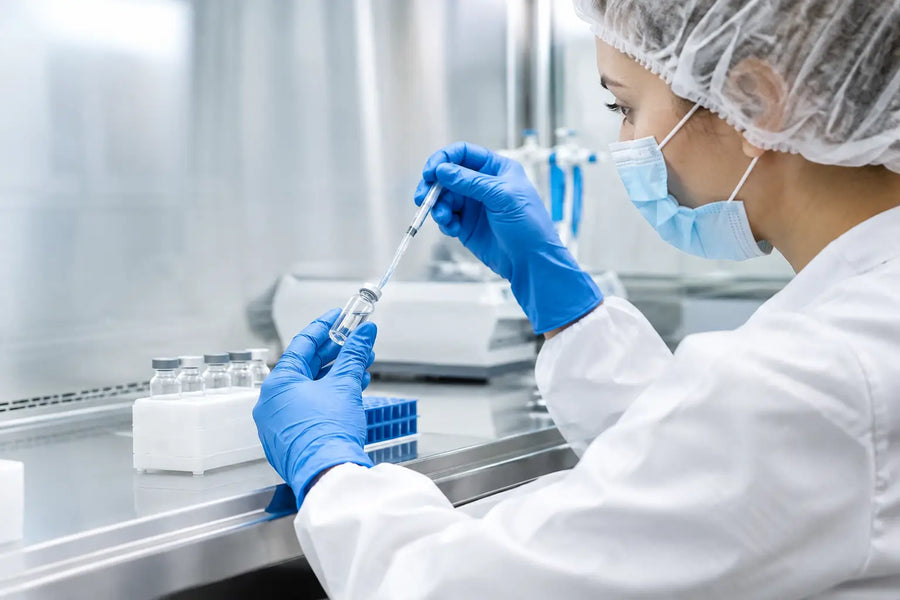
Best Practices for Peptide Aseptic Handling
Best practices for peptide aseptic handling protect research samples through clean technique, controll...
Read article →
Peptide Stability Examples That Affect Research
Practical peptide stability examples for research workflows, covering degradation routes, storage vari...
Read article →